

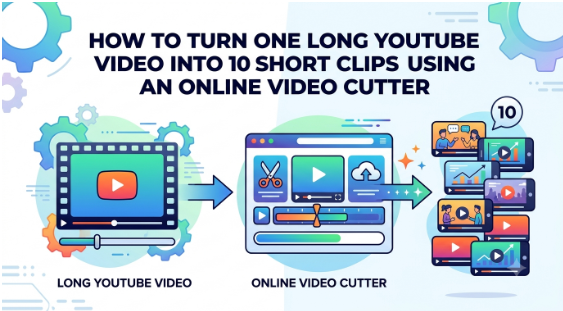
Long-form YouTube videos can contain dozens of valuable moments, but many viewers may not watch an entire 20-, 30-, or 60-minute video. Instead of letting those moments remain buried in a long timeline, creators can repurpose them into short, focused clips for YouTube Shorts and other social platforms.
The good news is that you don’t need advanced video-editing skills to do this. A Free Online Video Cutter can help you quickly identify interesting sections, trim unnecessary footage, and create multiple short clips from one long video.
YouTube itself also provides tools for creating Shorts and clips from existing content. Its current Shorts guidance allows eligible square or vertical videos up to three minutes to be categorized as Shorts, while YouTube Studio also offers a video-clips tool for extracting segments from long-form videos.
This guide explains how to turn one long YouTube video into 10 short clips using an online video cutter, along with practical tips for choosing the best moments and preparing them for publication.
Why Turn One Long Video into Multiple Short Clips?
Creating short clips from existing content is more than simply cutting a video into smaller pieces. It is a content-repurposing strategy that allows you to get more value from footage you have already recorded.
For example, imagine you have a 30-minute tutorial about video editing. Instead of publishing only the complete tutorial, you could extract:
- The most important beginner tip
- A common editing mistake
- A quick troubleshooting solution
- A useful keyboard shortcut
- A before-and-after demonstration
- A frequently asked question
- A practical editing technique
- A surprising fact
- A step-by-step mini tutorial
- A final takeaway
Each clip can focus on one specific idea.
YouTube says Shorts can help creators reach audiences through the Shorts feed, search results, the homepage, subscriptions, and other discovery surfaces. This makes short-form content a useful way to give viewers another entry point into your channel.
What Is an Online Video Cutter?
An online video cutter is a browser-based tool that lets you remove unwanted portions of a video by selecting a starting and ending point.
Instead of installing a full video-editing application, you can upload a video, select the section you want to retain, and export the trimmed clip.
A Free Online Video Cutter is particularly useful when your objective is straightforward trimming rather than complex editing.
For example, if your original video is 30 minutes long and an interesting explanation occurs between 08:20 and 09:10, you can select that section and create a separate clip.
An online cutter can therefore simplify the repetitive process of creating multiple short videos from one long recording.
Stellar Online Video Cutter is designed for quick online video trimming without requiring a traditional desktop editing workflow. Stellar’s online video tools describe its Video Cutter as a way to trim videos quickly without downloads.
How to Turn One Long YouTube Video into 10 Short Clips
Step 1: Start With Your Original Long-Form Video
The first step is to identify the source video you want to repurpose.
Ideally, choose a video containing several independent ideas rather than one continuous discussion. Tutorials, interviews, podcasts, webinars, product demonstrations, reviews, educational videos, and presentations are particularly suitable.
Before cutting anything, watch the video and make a list of potentially valuable moments.
For example:
| Clip | Time Range | Main Idea |
|---|---|---|
| 1 | 02:15–03:05 | Biggest beginner mistake |
| 2 | 05:40–06:25 | Quick productivity tip |
| 3 | 08:10–09:00 | Important technique |
| 4 | 11:20–12:15 | Common problem |
| 5 | 14:05–14:55 | Step-by-step solution |
| 6 | 17:30–18:20 | Expert recommendation |
| 7 | 20:10–21:00 | Interesting example |
| 8 | 23:15–24:05 | Before-and-after result |
| 9 | 26:00–26:50 | Frequently asked question |
| 10 | 28:10–29:00 | Final takeaway |
Creating this list before editing saves time because you know exactly which sections you need to extract.
Important copyright consideration
Only cut and repurpose videos that you own or have permission to use. If you’re working with someone else’s content, check the applicable rights and YouTube’s policies before downloading, editing, or re-uploading it. YouTube specifically warns that copyright-protected material used in Shorts can result in Content ID claims or other copyright action.
Step 2: Identify the 10 Most Valuable Moments
Not every part of a long video deserves to become a Short.
The goal should be quality rather than simply dividing the video into ten equal pieces.
Look for moments that can stand on their own.
Look for strong hooks
A good clip should quickly communicate why someone should continue watching.
For example:
- “Most beginners make this mistake…”
- “Here’s the fastest way to…”
- “You don’t need expensive software to…”
- “Before you upload your next video, do this…”
- “This simple trick can save you hours…”
A clip that takes 20 seconds to reach its main point may lose viewers before the valuable information begins.
Look for complete ideas
Avoid cutting a sentence or explanation in half simply because it fits your desired duration.
Each clip should ideally have a beginning, useful information in the middle, and a clear conclusion.
This makes the clip understandable even when someone hasn’t watched the original long-form video.
Step 3: Open a Free Online Video Cutter
Once you have identified the sections you want to extract, open a Free Online Video Cutter.
With an online tool such as Stellar Online Video Cutter, you can work through a browser instead of opening a full desktop video editor.
The basic workflow is straightforward:
Upload → Select the section → Trim → Export
This approach is particularly convenient when your main objective is cutting rather than adding complex transitions, effects, or animations.
Step 4: Upload the Video
Upload your original video to the online cutter.
Depending on the tool and video size, the upload time can vary. A large 4K recording will generally take longer to upload than a smaller compressed file.
For a smoother workflow:
- Use a reliable internet connection.
- Keep the original video available as a backup.
- Avoid repeatedly re-encoding the same file.
- Make sure you have enough local storage for the exported clips.
- Keep track of the original video’s resolution and aspect ratio.
If your long video contains important footage, don’t delete or overwrite the source file after creating the clips.
Step 5: Select the First Segment
Now move the timeline to the starting point of your first clip.
Suppose your first useful section begins at 02:15 and ends at 03:05.
Set:
Start: 02:15
End: 03:05
Preview the selection before exporting it.
Pay particular attention to the beginning and ending frames. If the clip starts in the middle of a sentence or ends abruptly, adjust the start and end points slightly.
A few seconds of additional footage can sometimes make a clip feel much more natural.
Step 6: Trim the Clip
After selecting the desired section, use the cutter’s trimming function to remove everything outside your selected range.
The resulting video should contain only the relevant segment.
Repeat this process for each of your 10 selected sections.
The advantage of using a dedicated cutter is that you don’t need to load every clip into a complicated timeline. When the objective is simply extracting specific portions, trimming is often enough.
Step 7: Create All 10 Clips
Now repeat the process for the remaining sections.
A practical workflow is to maintain a simple naming system:
- Video-Clip-01-Beginner-Mistake
- Video-Clip-02-Editing-Tip
- Video-Clip-03-Common-Problem
- Video-Clip-04-Quick-Solution
- Video-Clip-05-Tutorial
- Video-Clip-06-Expert-Tip
- Video-Clip-07-Example
- Video-Clip-08-Before-After
- Video-Clip-09-FAQ
- Video-Clip-10-Takeaway
This makes it much easier to identify the clips later.
It also prevents confusion if you are creating content from several long-form videos.
Step 8: Make Each Clip Stand on Its Own
Simply trimming a video does not automatically make it a good Short.
After exporting each clip, watch it independently.
Ask yourself:
Can someone understand this clip without watching the original video?
If the answer is no, adjust the beginning or ending.
For example, suppose someone says:
“As I mentioned earlier, this feature…”
That sentence may make sense inside the original 30-minute video but may be confusing when viewed as an independent Short.
Instead, select a few seconds earlier so the context is included.
The objective is to make each clip feel like an intentionally created piece of content rather than a random fragment.
Step 9: Optimize Clips for Short-Form Viewing
YouTube currently categorizes eligible square or vertical videos up to three minutes as Shorts.
However, duration isn’t the only consideration.
Keep the opening engaging
The first few seconds should establish the topic quickly.
Remove unnecessary pauses
Long pauses, repeated statements, introductions, and filler can make a short clip feel slow.
Focus on one topic
Don’t try to squeeze three unrelated ideas into one clip.
One clip should generally communicate one clear message.
Consider vertical formatting
If you’re repurposing a landscape YouTube video for Shorts, you may need additional editing to create a suitable vertical composition. A video cutter can handle the trimming portion, while cropping or resizing may require an editor that supports those functions.
Step 10: Preview Every Clip Before Publishing
Before uploading the clips, watch each one from beginning to end.
Check:
- Does the clip start naturally?
- Is the main point clear?
- Is there unnecessary footage?
- Is the audio understandable?
- Does the ending feel complete?
- Is the video correctly oriented?
- Is the resolution suitable?
- Does the clip contain copyrighted material you don’t have permission to use?
This final review can prevent small editing mistakes from becoming published content.
How to Make Your 10 Clips More Engaging
Once the basic cuts are complete, think about how each clip can provide immediate value.
- Start With the Most Interesting Statement
Instead of beginning with a long introduction, start near the point where the speaker makes the key statement.
- Remove Dead Space
Silence and unnecessary pauses can be particularly noticeable in short-form content.
- Avoid Repeating the Same Information
If the speaker explains the same concept multiple times, retain the clearest explanation.
- Give Each Clip a Clear Purpose
Your ten clips could represent ten different questions, tips, mistakes, or lessons.
- Create a Logical Content Series
You can also publish the clips as a sequence.
For example:
Part 1: The biggest mistake
Part 2: How to fix it
Part 3: The recommended technique
Part 4: A real-world example
This gives viewers a reason to explore the rest of your content.
Online Video Cutter vs. Full Video Editor
A Free Online Video Cutter is ideal when your primary task is trimming footage.
A full video editor becomes more useful when you need:
- Advanced transitions
- Multi-track editing
- Motion graphics
- Complex effects
- Color correction
- Detailed audio editing
- Animated captions
- Multiple overlays
For straightforward content repurposing, however, installing a large editing application may be unnecessary.
If the task is simply “Find this section and cut everything else,” an online cutter can provide a much faster workflow.
YouTube’s Built-In Options for Creating Clips
YouTube itself now provides several ways to repurpose existing content.
YouTube Studio’s video-clips tool lets creators extract engaging sections from long-form videos and publish them as separate videos. YouTube also offers AI-powered suggested clips for eligible podcast content, which can identify potential highlights and let creators adjust their start and end points.
YouTube also allows creators to create Shorts from their own eligible long-form videos. Its help documentation describes selecting up to 60 seconds through the “Edit into a Short” workflow in the applicable Shorts creation experience.
These features can complement an external Free Online Video Cutter. The online cutter gives you greater control over extracting specific sections before preparing the resulting files for publication.
Common Mistakes to Avoid
Cutting Clips Without Context
A clip may look interesting to you because you remember the original discussion, but a new viewer doesn’t have that context.
Always watch the clip independently.
Making Every Clip the Same Length
Don’t force every video to be exactly 30, 45, or 60 seconds.
Let the content determine the appropriate length.
Starting Too Slowly
Long introductions are often unnecessary in short-form content. Start closer to the actual value.
Ignoring Audio
A visually impressive clip won’t perform well if viewers struggle to understand the speaker.
Repeatedly Compressing the Video
Repeated export and re-export cycles can reduce quality. Whenever possible, work from the original source and export the final clip once.
Forgetting Copyright
Repurposing your own content is generally straightforward, but using someone else’s copyrighted material can create problems. YouTube advises creators to ensure that externally created Shorts contain material they are authorized to use.
Final Thoughts
Turning one long YouTube video into ten short clips can significantly extend the usefulness of your existing content. Instead of creating ten videos from scratch, you can identify ten valuable moments within one recording and transform them into focused pieces of short-form content.
A Free Online Video Cutter makes the core process simple: upload the source video, identify a useful section, set the start and end points, trim the footage, and export the result.
The most important part, however, isn’t the cutting itself. The quality of the selected moments determines the quality of the final clips. Choose sections that have a clear message, strong opening, useful information, and enough context to make sense independently.
If you regularly publish long-form YouTube videos, adopting this workflow can turn every recording into a larger collection of reusable content for Shorts and other social channels.
FAQs
- Can I use a Free Online Video Cutter to create multiple clips from one video?
Yes. You can use an online video cutter to select different sections of a long video and export them as individual clips. For example, one 30-minute recording can be divided into ten focused clips based on different timestamps.
- How long should YouTube Shorts be?
YouTube currently supports Shorts up to three minutes for eligible square or vertical videos. However, the ideal duration depends on the topic. A concise 30-second clip can be more effective than stretching the same idea to three minutes.
- Can I turn someone else’s YouTube video into Shorts?
You should only use content that you own or have permission to reuse, or content that is otherwise appropriately licensed or permitted under applicable rules. Copyright-protected material can result in claims or removal.
- Is an online video cutter enough for creating YouTube Shorts?
It can be enough for basic trimming. If you also need captions, effects, transitions, resizing, animations, or advanced audio editing, you may need a more comprehensive video editor.
- What is the easiest way to turn a long video into 10 clips?
First watch the complete video and record the timestamps of ten valuable moments. Then use a Free Online Video Cutter to extract each section, preview every clip independently, make sure the content has sufficient context, and export the final clips for your intended platform.
